YOGA EXERCISES TO OPEN THE HIPS: THE SHOCKING TRUTH NO ONE TALKS ABOUT
You might practice hip-opening yoga because someone once told you postures like Child’s Pose are essential to any well-balanced yoga flow.
You might practice yoga exercises to open the hips because these postures feel undeniably delightful in the moment.
Or you might practice hip-opening stretches because a LuluLemon-clad 20-something named Rain emphatically declared you should hold Pigeon Pose for 15 minutes if you ever wanted to release the trauma from that one time in sixth grade you farted in the middle of math class…
Whatever the reason, here’s what you need to know:
Hip-opening yoga poses cause instability in the body, and where there is instability, pain and injury are sure to follow.
It’s true. Poses like Pigeon and Child’s Pose are causing you more harm than good!
If you want to improve your range of motion, increase your strength and stability, and finally fix tight hips for good, then it’s time to stop stretching — and start activating.

What are hip-opening yoga postures?
Before we dive into the biomechanics of hip openers, let’s take a sec to define hip-opening yoga postures:
Hip-opening poses are yoga postures that stretch the muscles around the hip joints and pelvis, including the glutes, groin, and inner thighs. Popular hip-opening stretches include Pigeon Pose, Lizard Pose, and Child’s Pose.
In Pigeon Pose, you extend one leg behind you, then fold forward over your front leg to deeply stretch the glute and outer hip. Lizard pose is similar but with your front foot positioned on the outside of your hands, allowing for a deeper stretch in the groin area.
To do Child’s Pose, you lower your hips towards your heels while stretching your arms forward on the mat. (Remember Child’s Pose — we’ll return to this problematic posture later!)
Hip openers are popular within the yoga world for a few reasons, but one of the biggest is that they feel pretty darn good the moment we practice them. And the reason they feel so good is because most of us lead largely sedentary lifestyles.
We don’t mean to spend 1,378 minutes a day going from our car to an office chair to the sofa to our bed… but it happens.
Sitting for extended periods puts the spine in flexion (bent forward). Prolonged flexion pulls the spinal joints closer together, and discomfort and pain often result.
So, how do we address this imbalance in the body?
Most yoga instructors teach that yoga exercises to open the hips will lengthen the hip muscles to improve flexibility and cure physical ailments. This would be a mistake.
Let me be clear:
Tight hips are absolutely a problem and can lead to numerous health problems, including back pain, knee pain, sciatic pain, and even shoulder pain! However, the solution is never stretching or “opening” the muscles.
If we truly want to relieve tight hips to eliminate pain, improve mobility and decrease the risk of injury, then it’s time to stop the flexibility madness. Let me explain.
Hip-opening yoga stretches (and my brush with a spinal fusion)
For decades, I seriously abused my body in the name of fitness and yoga. It would take me decades to realize stretching was causing me debilitating injuries and soul-crushing pain.
Whenever a lightning bolt of pain struck my back, I practiced “restorative” forward folds and hip-opening yoga postures.
And you know what? Immediately after finishing yoga exercises to open the hips, I would feel better. Until… I’d wake up the following day in excruciating pain. By my late-30s, the pain in my right hip had become unbearable.
Desperate for answers, I consulted an orthopedic surgeon. The diagnosis?
I had a herniated disc pressing the nerves in my lower back. This overstimulated my pain receptors, which triggered my sciatic nerve and created an inflammatory response in my body.
In other words, I would need a spinal fusion in my lower back if I wanted to continue my active lifestyle. In the meantime, I could try steroid injections.
A spinal fusion? How could that be possible?
In short, here’s what happened:
My brain didn’t know which muscle to contract to stabilize my spine, hips, and pelvic area. My gluteal muscles were total deadweights when they should have acted as shock absorbers for my lower back.
And my psoas muscle? It’s supposed to maintain the integrity of your lower back. In fact, it is the only muscle that attaches to the anterior (front) of the lumbar spine. However, my psoas was doing absolutely nothing. Every single muscle that should have supported my spine had shut down — and I wondered why I suffered from chronic pain!
The problem with yoga exercises to open the hips
We sometimes talk about yoga and stretching like they’re the same thing, but they aren’t — yoga will change your life, but stretching will only increase your risk of pain and injury.
A complete examination of the perils of stretching is beyond the scope of this article. If you would like a deep dive into the science of why stretching is causing you more harm than good (and what to do instead), I suggest you start with my best-selling book Stop Stretching!
For a quicker overview of the many problems with stretching, try these articles:
How Much Stretching Is Too Much? The Surprising Truth You Need To Know
AYAMA™ 101: Change Your Life With This Revolutionary Approach to Yoga and Muscle Activation
In the meantime, know this:
Stretching incapacitates muscle function — it actually weakens the muscles! And where there is weakness, there is a high opportunity for injury.
Look, whenever I went to a yoga teacher to talk about my back pain, I heard the solution was to “open up my hips.” But biomechanically speaking, this doesn’t make any sense!
Think of a coiled Slinky. When we open the hips, we unwind the tightly wound slinky structure of our muscle spindle.
An unloaded spindle has a drastically diminished ability to receive input from the nervous system; it doesn’t know whether it should contract or relax.
We must re-coil our muscle spindles to re-establish the connection between the brain and the muscle.
So, instead of opening the hips, we can reduce tightness and improve neuromuscular sensitivity when we practice Applied Yoga Anatomy and Muscle Activation™.
Take the glutes. Your glutes act like shock absorbers to protect the integrity of your spine.
If you have weak, inactive glutes, your lower back and knees must step in and act as your body’s shock absorbers; they will, eventually, bear the repercussions. This is why many people require knee replacements and lower back fusions!
Fix your tight hips with these 5 AYAMA™ exercises
So, if yoga exercises to open the hips lead to instability and injury, how do you fix tight hips? The answer lies in AYAMA™.
AYAMA stands for Applied Yoga Anatomy and Muscle Activation, and it’s a revolutionary approach to yoga that focuses on activating the muscles (never stretching them out.) If you’re ready to regain strength, stability, and mobility, then AYAMA is an intelligent place to start.
Let’s explore five easy yet powerful AYAMA exercises that will relieve tight hips for good:
1. Hand-To-Knee Activation
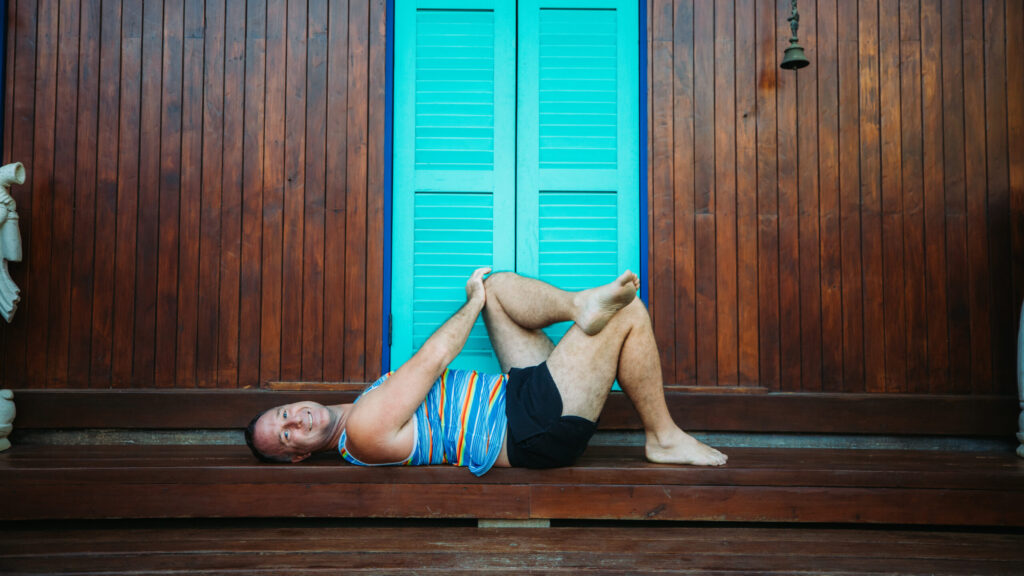
Lie on your back, and bend your knees with your feet planted beneath you. Cross your left ankle over your right knee (just below the kneecap.)
Now, bring the heel of your right hand to your left knee. Push your hand into your knee (and your knee into your hand.) Be careful not to peel your shoulder off the ground. You should feel your psoas muscle engaging. Hold this position for six seconds and repeat it six times.
Next, straighten your leg and externally rotate it while keeping the opposite hip bone on the ground. Slowly lower the leg down to the ground. Repeat this movement a few times, then repeat the entire exercise on the opposite side.
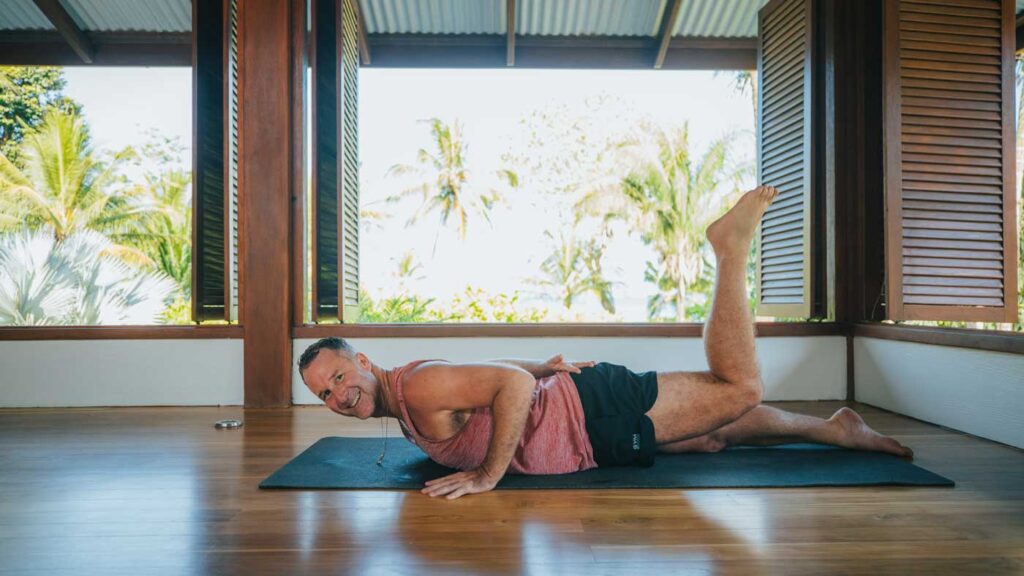
2. Pillow Talk Pose
This yoga pose, also known as Clamshell, is a fantastic way to activate your gluteus maximus and gluteus minimus while enhancing hip mobility.
Begin by lying on your side, bending your knees, and bringing them forward slightly. Keep your legs bent and lift your top leg; be careful not to lean back.
You should feel the muscles in your glutes and piriformis activate. These muscles are crucial for relieving tightness in the hips, so engaging them mindfully is essential.
Hold for six seconds, then slowly lower your knee back down. Repeat six times, then switch sides.
3. Straight Leg Rotation
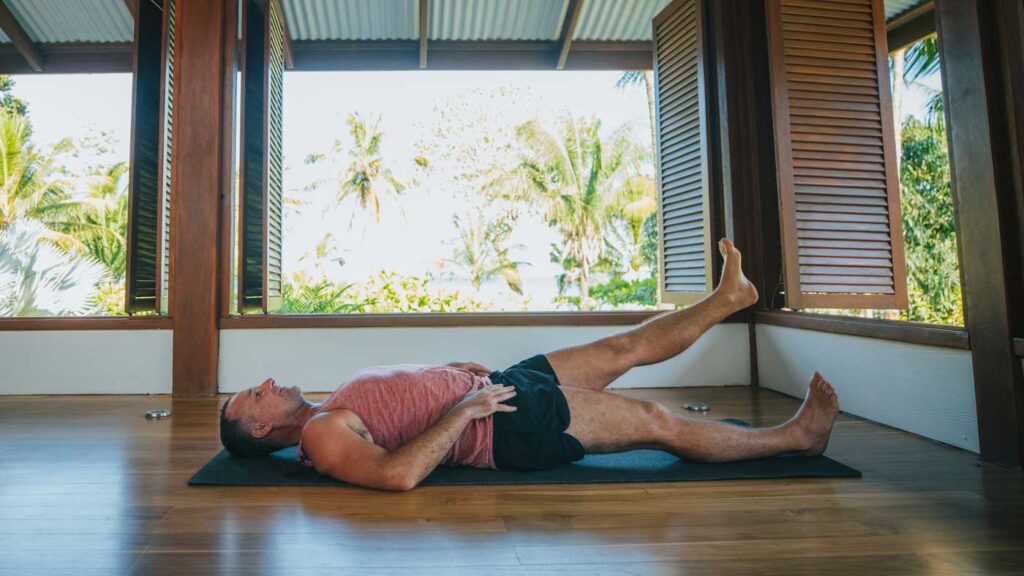
This AYAMA exercise targets the TFL, a muscle that can cause hip stiffness and limit mobility when inactivated.
To begin, lie on your back, straighten your legs, and release your head. Focus on relaxing your body as much as possible. Next, lift your left leg and internally rotate it (just slightly.)
Be careful not to tilt your pelvis forward, but instead, rotate your leg just enough to feel the inner thigh engaging. Lift the leg as high as you can while keeping it as straight as possible.
Hold for six seconds before releasing, and repeat this movement six times (on both sides.)
For variation, you can repeat this exercise with a slight external rotation of the leg and neutral leg to target different muscle groups and promote complete hip mobility.
4. One Leg Locust Pose
Lie on your stomach, and bend your left knee. Pause. Ensure that both your hips are firmly planted on your mat.
Begin to lift your left thigh bone off the ground. Ensure your pelvic bones remain rooted to your mat as you do so.
Hold for six seconds, and repeat it six times. Then move to your right side.
5. Bridge Pose
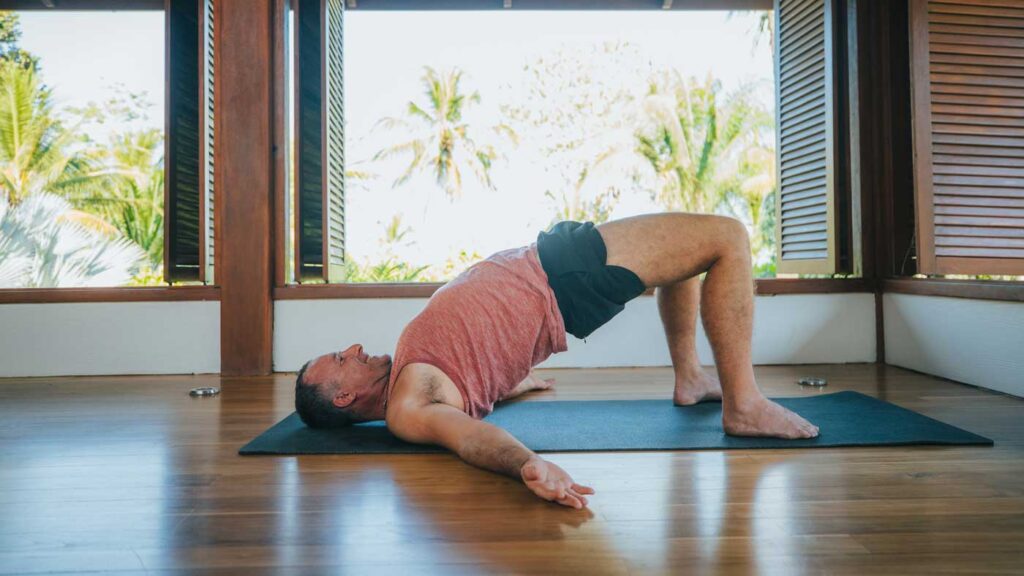
This popular yoga posture is a potent way to fire up the gluteal muscles while strengthening the lower back…
…and it’s one of my go-to’s for daily AYAMA practice!
Lie on your back, and bend your knees with your feet planted beneath you. Relax your arms up overhead so you resist the urge to use your arms to lift off the ground. Now lift the gluteal muscles as high as you can. Ensure that you’re squeezing your buttocks! Don’t let the knees collapse inward or fall open, but instead, imagine you are pressing a block between your thighs.
Hold for six seconds, then repeat the move six times.
It’s normal to feel your lower back muscles working in the bridge pose. So long as there is no pain, know that this pose is working your gluteal muscles.
Now…
This is an abbreviated yoga flow for tight hips. For a full-length yoga practice, join me on YouTube for my yoga for tight hips workout.
You’ll get these AYAMA poses (and more) PLUS a bonus test at the end, so you can easily check that your hip flexors are working properly!
The number one hip opener you should never practice
This is important.
There is one hip opening yoga pose that you should never, ever, in eleventy thousand years, practice again:
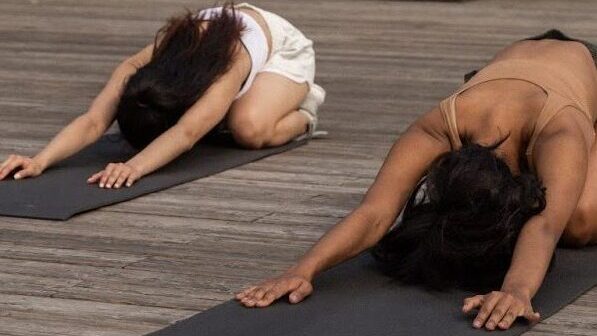
Child’s Pose.
Child’s pose over-stretches your back muscles and weakens your neuromuscular connection. If you need to rest during your yoga flow, try Savasana, relaxing on your back with your arms extended alongside your torso.
Whatever you do, say no to Child’s pose!
To sum it up
So, can you stretch the hips too much with yoga exercises to open the hips?
The answer is a loud, resounding, shout-it-from-the-rooftops (even if it annoys your crotchety 112-year-old neighbor Marge)…
…YES!
Remember this:
When muscles are pushed beyond their end range of motion, the neuromuscular connection is disrupted, and the strained muscles can no longer contract on demand. This leads to muscle instability, weakness, and pain.
If you want to build strength, stability, and alignment, don’t “open the hips” or stretch the hip muscles past where they can move independently.
Instead, practice hip activations that promote muscle contractions to relieve hip tightness. Your entire body will thank you.
Learn more about Applied Yoga Anatomy and Muscle Activation (AYAMA) here.