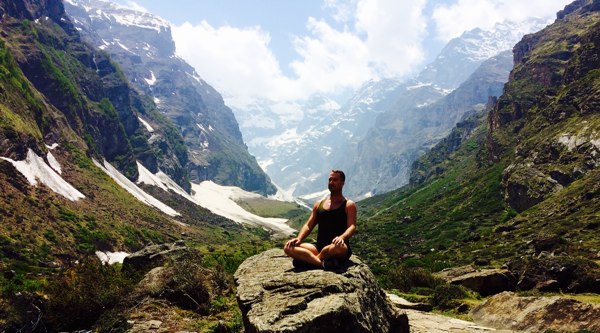
Sometimes the weight of the world seems to be pressing in on all fronts. The desire to breathe and feel freedom is great.
For many us, we seek out a release valve for the pressure of life by indulging in pleasures. We hope that for one moment we will forget our burdens or responsibilities. But this false sense of relief gained by disconnecting doesn’t really get to the heart of what is really disturbing you in the first place.
This practice of disconnecting to feel connected may seem to work in the moment, but ultimately, is not sustainable.
Over time the practice of avoidance through overindulgence leads us desensitized and ultimately to burnt out.
A good backbending practice that is sequenced intelligently and practiced methodically will leave you feeling energized. A good sequenced backbend practice will empower you to face life and whatever obstacles are in front of you.
My teacher once taught me that backbends help to increase the Rajas Guna. Rajas, according to the translation he gave, literally means “the light of the stars.”
What a beautiful idea! To do a yoga practice that engenders and brings the light of the stars to your very heart.
While backbending is not always people’s first choice of postures, there is no doubt that once people have finished an intelligently sequenced backbending practice, that they feel so much better afterwards.
Many positive effects of backbending include:
– Feeling positive and uplifted
– Empowered to take on the most difficult tasks
– Feeling more courageous
– A flood of creativity (this always happens to me after a good backbending practice)
– Open lungs and a conditioned respiratory system
– Mobility in your spine
– A super strong back leaving you with the feeling of more stability in your life
Yogi Aaron’s Secret Backbending Sequence
One of the biggest questions people have is how often should I do this sequence? If you are new to yoga, practice this sequence two or three times a week. If you have a good practice, do it once a week, and/or when you need a creative burst of energy in your life.
If you are limited for time, my suggestion is to do the first half, and then continue on depending on how much time is available to you.
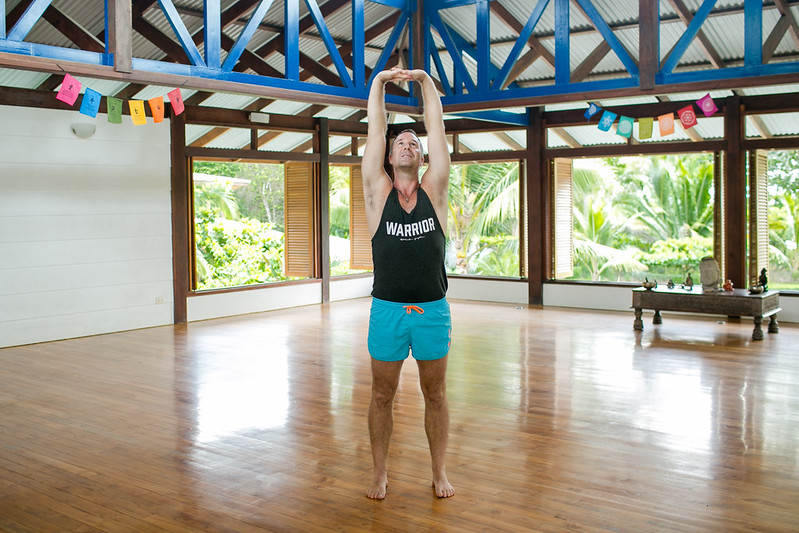
Step 1 – Tadasana / Mountain Pose – 5 breaths
Standing with the legs about hip distance apart, bring your hands above your head, interlace your fingers and press the palms of your hands upwards. While you are here, firmly lift your thighs while pressing your heels toward the floor. Lift your navel towards your heart, and feel the space between your floating ribs and iliacus increasing.
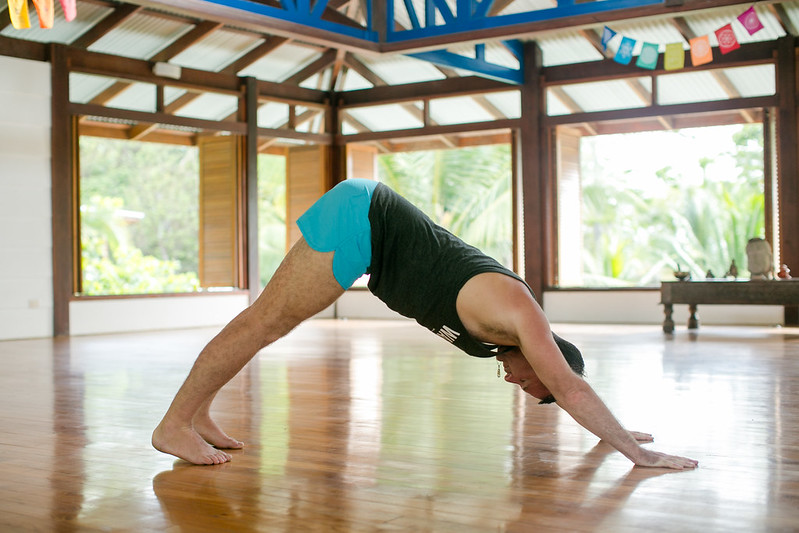
Step 2 – Adho Mukha Svanasana / Downward Facing Dog 1 – 3 minutes
Standing upright, fold forward taking your hands to the floor. Bend your knees as needed. And then walk your hands forward along the floor making the shape of an inverted V.
Stay here for 1 minute. Overtime, you will be able to hold this pose for 3-minutes
Things to work on in downward facing dog:
– Press the palms of your hands into the floor
– Lift your forearms away from the floor
– Hollow out your arm pits
– Outer rotate your biceps
– Take your shoulders away from your ears
– Press your leg bones back
– Lift your buttocks toward the ceiling
– Press your heels toward the floor
To learn more about how to do Downward Facing Dog, please click here.
Step 3 – Salabasana / Locust Pose – 60 seconds
Lying on the floor on your stomach with your hands beside your waist, press the hands into the floor while simultaneously lifting your chest up. If you can, stay here for 1-minute. This pose will help you to build tremendous strength in your back.
Step 4 – One Leg Salabasana Variation / One Legged Locust Pose Variation
Lying on your stomach, bend one knee, and lift that foot up toward the ceiling as high as you can. Hold for 10 seconds, and then do the other leg. Repeat for a total of two or three times.

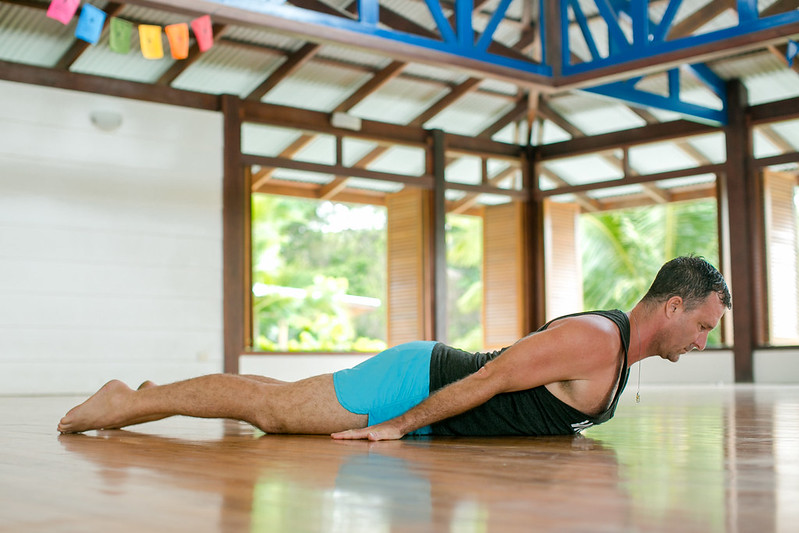
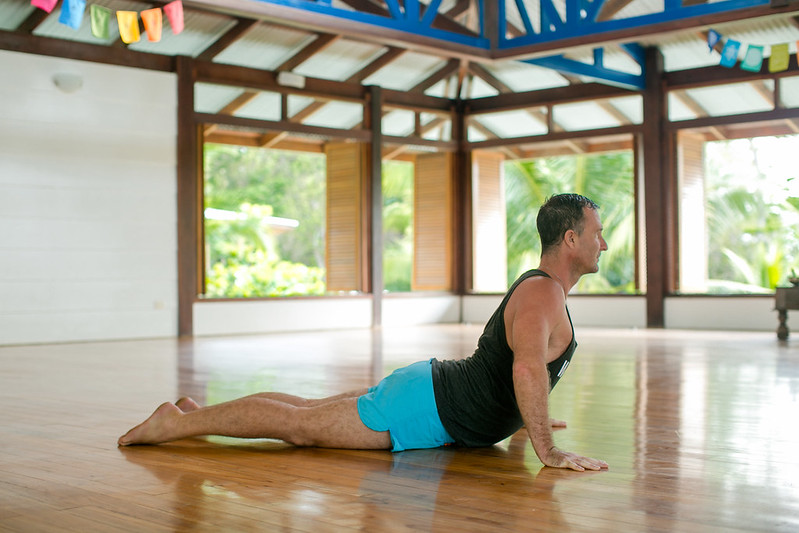
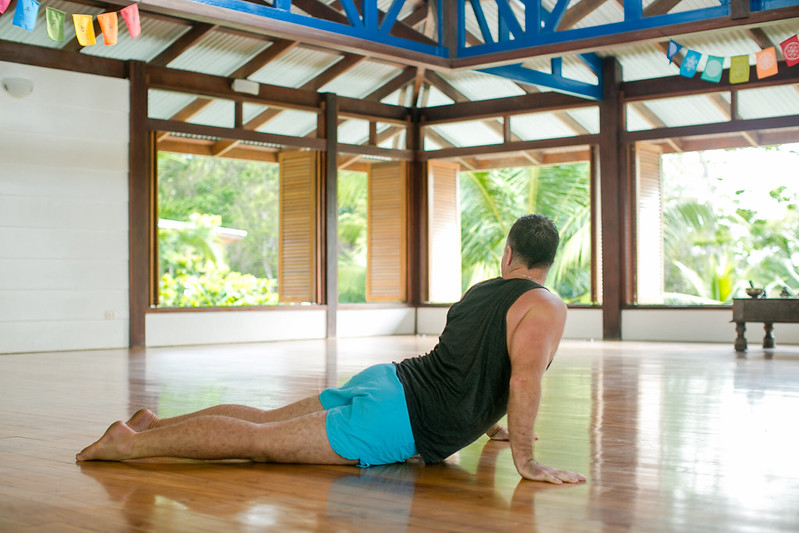
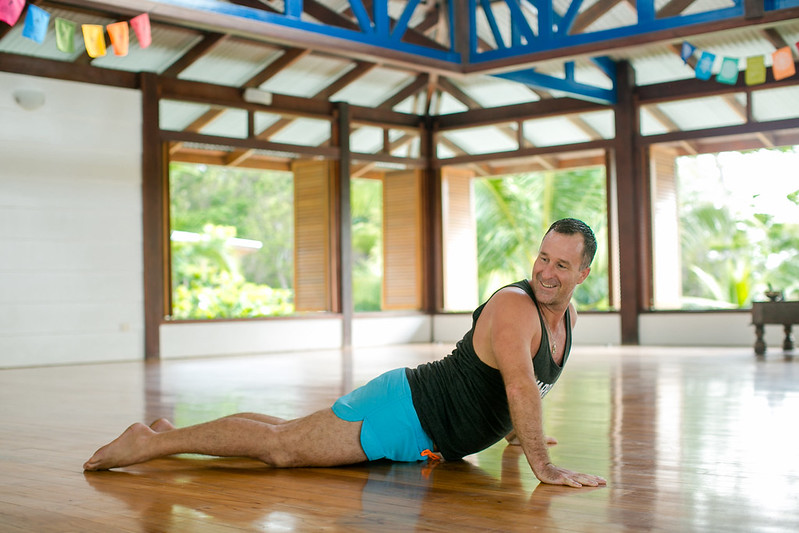
Step 6 – Bujangasana to Pavrita Bujangasana / Cobra to Twisting Cobra – 5 to 10 breaths
Lying face down on the floor, slide the palms of your hands underneath your shoulders, and then closer to your ribs. Now bring your hands a little wider. If you are on a yoga mat, perhaps bring your hands as wide as your yoga mat.
Using the strength of your arms, lift yourself up. Lift yourself up as high as is comfortable, BUT! do NOT straighten your arms. Keep the elbows slightly bent.
To work in this posture, pull the shoulder blades back while pressing the chest forward. Lift powerfully in your manubrium. (This is your upper sternum.)
Stay here for a few breaths, and then twist your upper torso and take your chin over your left shoulder for 1 or 2 breaths, and then tiwst your upper torso the other direction taking your chin to the right for 1 – 2 breaths.
Repeat this cobra sequence again if you like.
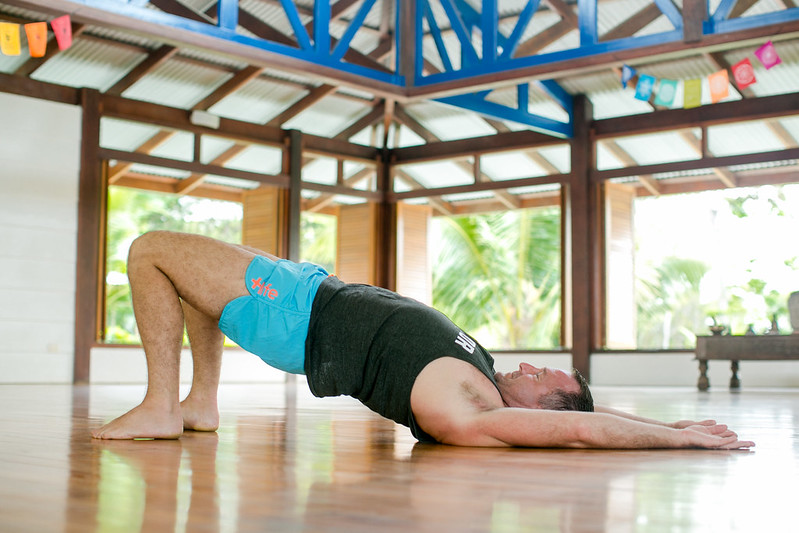
Step 7 – Setu Bandha Sarvangasana / Bridge Pose
A very simple pose to do, you can almost do this anywhere and it takes very little time to do it.
Come onto your back with your legs bent, feet resting on the floor. Bring your feet as close as you can to your buttocks. Bring your hands over your head. And then lift your hips toward the sky as high as you can.
You can do one of the following two exercises.
1. Lift the hips up for 10 seconds and squeeze your glutes. (Count one one thousand, two one thousand, three one thousand… all the way to 10) and then bring the hips back down. Repeat for a total of three times.
2. Lift the hips up as high as you can while squeezing the glutes and then lower them back down. Repeat 10 more times.
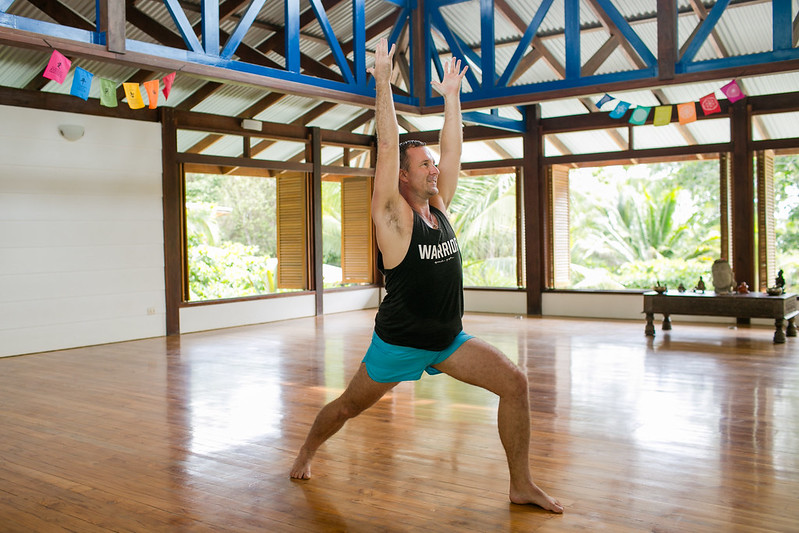
Step 8 – Warrior 1
Stay here for a few breaths on each leg.
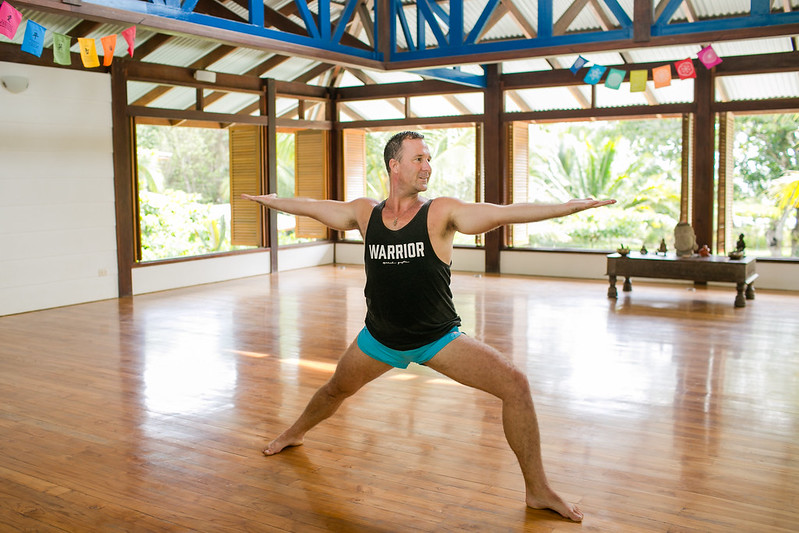
Step 9 – Warrior 2
Stay here for a few breaths on each leg.
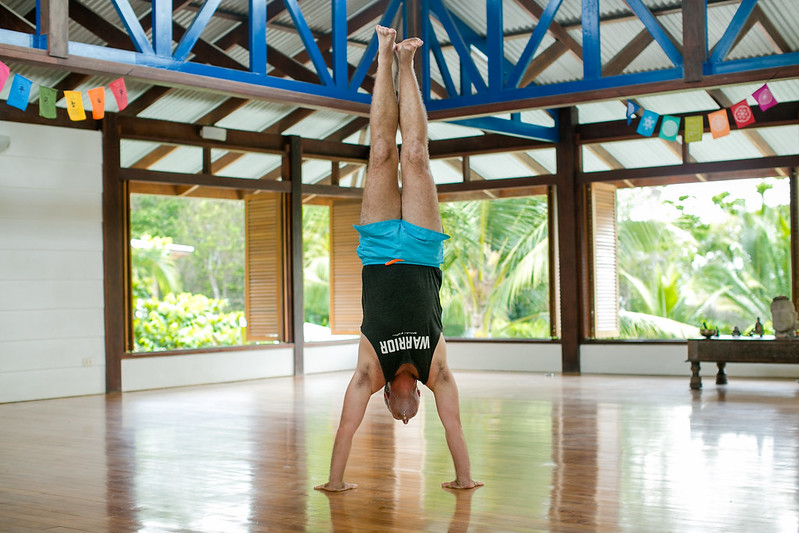
Step 10 – Adho Mukha Vrksasana / Handstand Pose – 1 minute
Do your handstand against the wall. Once you are in the pose, stay there for 1-minute.
For more information on how to do handstands, please click here.
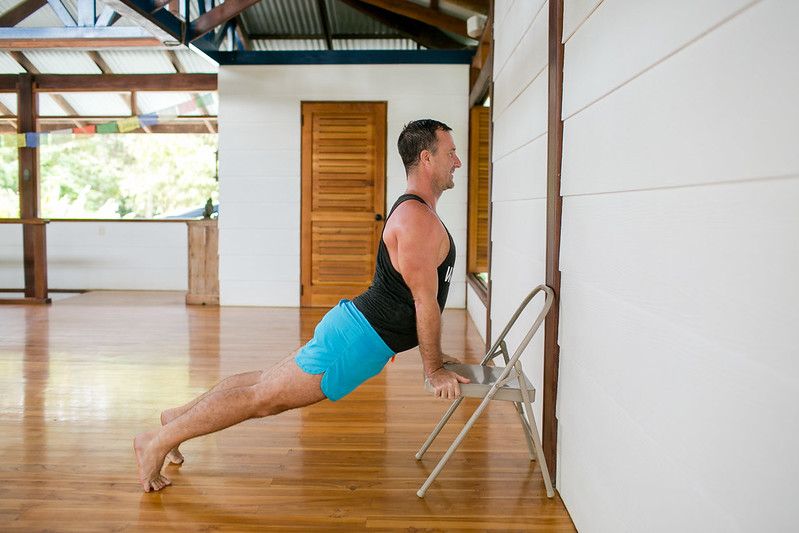
Step 11 – Salamba Ūrdhva mukha śvānāsana / Supported Upward Facing Dog Pose – 5 times
Bring the chair to the wall. bring your hands to the edges of the chair. Step your feet back coming into an variation of downard facing dog.
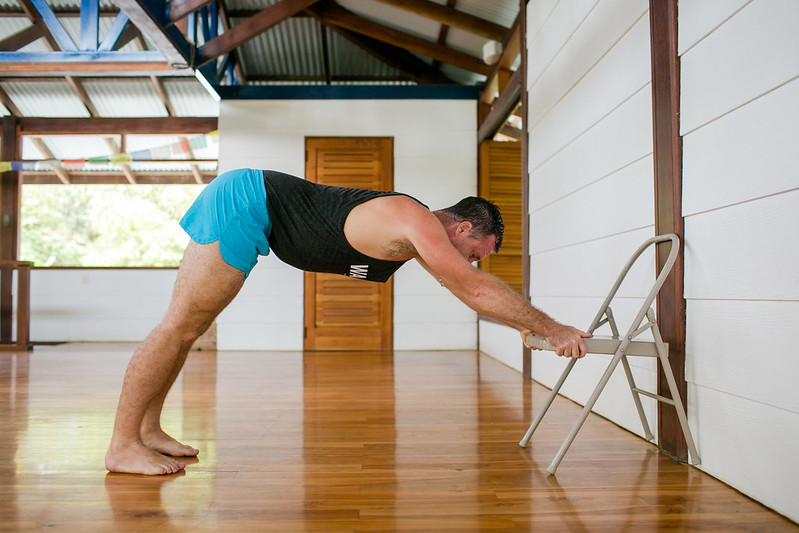
Now bring your torso forward so that your arms are supporting it. Press your sternum forward through your arms while lifting through the top of your head. Keeping your legs straight, press through the backs of your heels.
Move from the modified downward dog to upward dog 5 to 8 times.
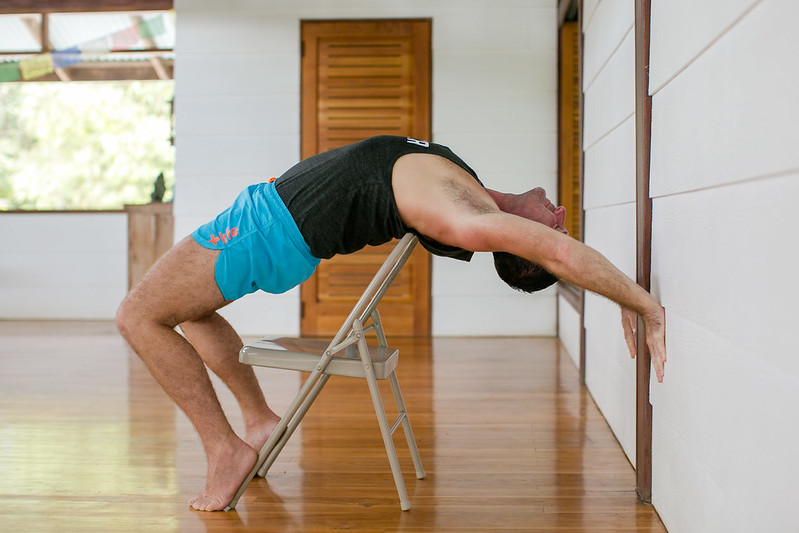
Step 12 – Urdhva Dhanurasana / Wheel Supported with Chair Pose – 10 breaths
To follow the steps on how to do this liberating yoga pose, please click here.
Once you are here, stay for 10 breaths.
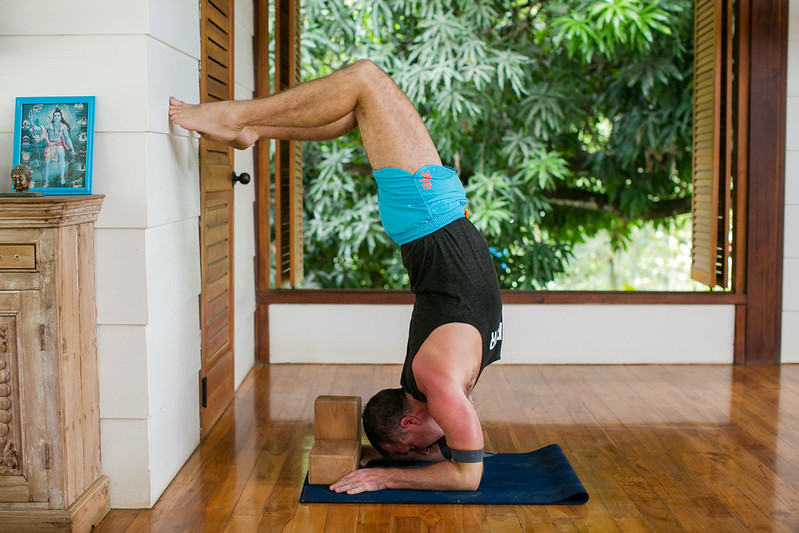
Step 13 – Pincha Mayurasana / Feather Peacock Pose – 1-minute repeat twice
Now that you have practiced inverting in handstand and opened up in supported wheel pose, you are ready for Pincha Mayurasana / Feather Peacock Pose, also known as Forearm Balance Pose. Please do this pose against the wall.
Why against the wall? Because we want you to be able to hold these poses for a long time. If you are only trying to work on balancing in the pose without the support of the wall, you will only be working on balance, and will more than likely fall out of the pose many times. We want you to be able to stay here for 1-minute, two times.
To understand how to do this pose, please click here.
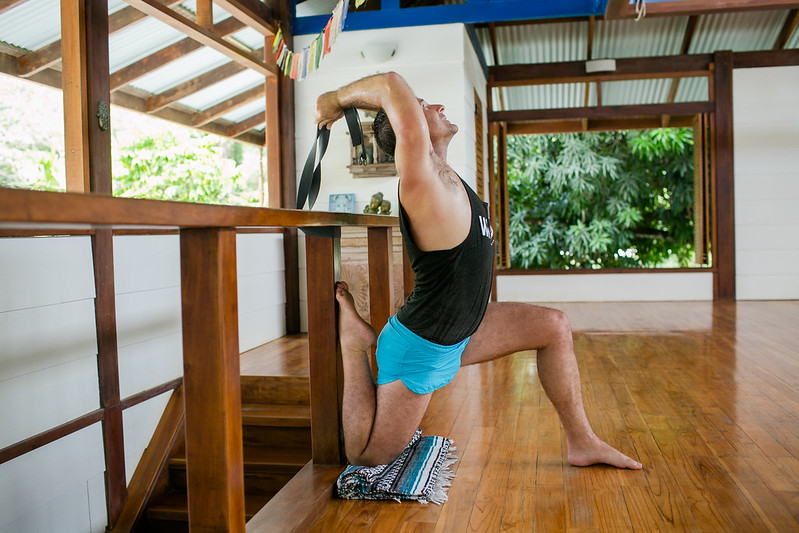
Step 14 – Deep Thigh Stretch – 1 – 3 minutes
I think this is one of the most important poses you can do in this series. In fact, if you have little time in your day for a full on practice, see if you can make some time to do this pose.
To read more about this pose, it’s benefits, how to do it and all of it’s variations, please click here.
Step 15 – Setu Bandha Sarvangasana / Bridge Pose – 5 – 10 breaths
A very simple pose to do, you can almost do this anywhere and it takes very little time to do it. This pose will help prepare you for the next pose coming up.
Come onto your back with your legs bent, feet resting on the floor. Bring your feet as close as you can to your buttocks. Bring your hands over your head and then lift your hips toward the sky as high as you can.
Stay here for about 5 – 10 breaths.
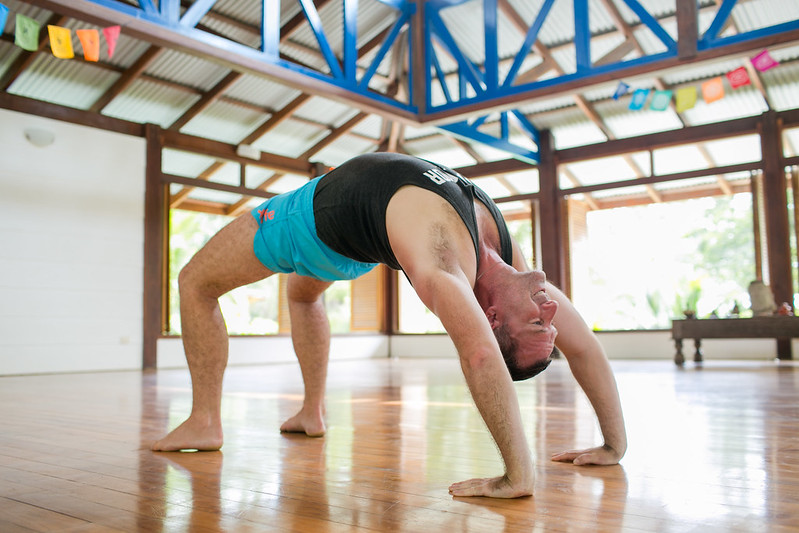
Step 16 – Urdhva Dhanurasana / Wheel Pose / Upward Facing Bow
Finally we have arrived to our apex posture. Wheel Pose is one of the hardest and most challenging yoga poses you will be faced with. For many, doing this posture is nearly impossible. As a yoga teacher, I have often witnessed how inaccessible Wheel pose can be. Many people struggle with Urdhva Dhanurasana because they are restricted in their shoulders and are generally tight in their upper bodies. Sometimes a person just hasn’t acquired the strength to lift into the posture yet.
If you think this is you but would still like to reap the rewards of wheel, then stick to doing this pose just with a chair for the time being.
But do work on it every time you do this practice.
Click here for more instructions on how to do Urdhva Dhanurasana / Wheel Pose / Upward Facing Bow safely.
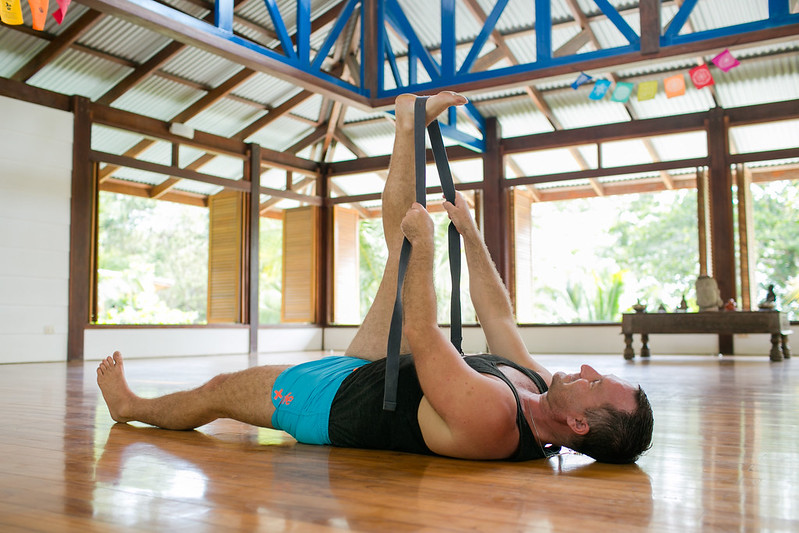
Step 17 – Supta Padangusthasana / Reclining Hand-to-Big-Toe Pose
Finally we come to the end of our sequence and finish up with the following two (important) postures.
The first counter pose we want to take is Supta Padangusthasana / Reclining Hand-to-Big-Toe Pose. This posture is REALLY important as it helps to realign the lower back.
It is important to stress this one point. The purpose of the this pose is NOT to stretch the hamstrings. (Although if you have really tight hamstrings, you will feel a deep stretch in them.) The purpose is to help align and stabilize the lower back.
Therefore, when you are doing supta padangusthasana, setting this pose up correctly is very important.
– Lie on your back.
– USE a strap!!!
– Wrap the strap around the foot JUST ABOVE THE HEEL. Do not place the strap around the ball of the foot.
– Straighten the leg bringing the foot to the ceiling.
– Keep the leg at 90 degrees. Do not bring the leg closer to you.
– With your hands grabbing the ends of the strap, and keeping the leg straight, pull the leg into the floor. This will feel really nice in your sacrum.
Step 18 – Savasana / Corpse Pose
Everyone has a favorite pose, and for most it is Savasana.
Savasana is not an easy posture to do. It is a practice of mindful relaxation.
After a deep backbending practice, it is REALLY important to stay here for a minimum of 5 to 15 minutes, and longer if you can.
Just some of the benefits of practicing savasana:
• It relaxes your whole body.
• Releases stress, fatigue, depression and tension.
• Improves concentration.
• Cures insomnia.
• Relaxes your muscles.
• Calms the mind and improves mental health.
• Excellent asana for stimulating blood circulation.
A good backhbending practice has the potential to fully awaken you at every level – mind, body and spirit. A key ingredient to a successful backbending practice is to have fun. Take pleasure and delight in the movement your body has, and be curious about what else your body can do.
You are a being full of magnificence and wonder. If that reality is not real for you, this sequence will awaken you to this truth.
Want to learn more about the power of yoga? Join Yogi Aaron for a Yoga Teacher Training!
All photos credited to the talented Maria Hillier.